Digital wallets provide full visibility into your inbound and outbound money flows, making it easier to manage your transactions. You can create as many wallets as needed across 38+ currencies, allowing you to organize funds by budget, customer, or partner. Every wallet has a unique Wallet ID (WID).
Want to see how this works in real-time? Use the interactive demo below to click through the steps before reading the full guide.
Creating a New Wallet
Log in to your Company Account.
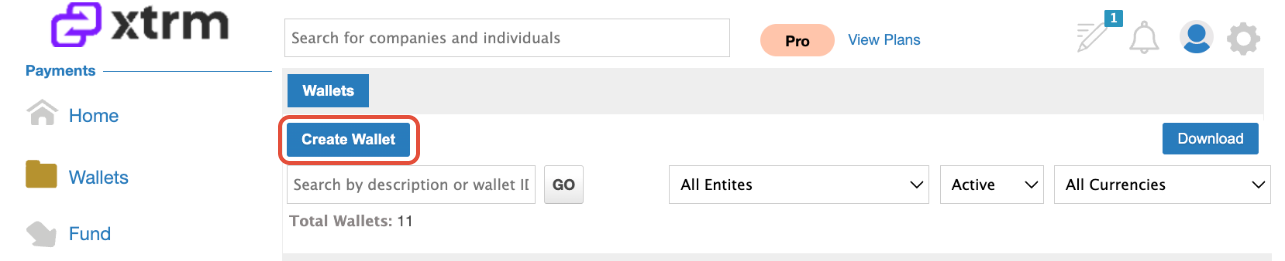
Click Wallets in the left-hand navigation menu.
Select Create Wallet.
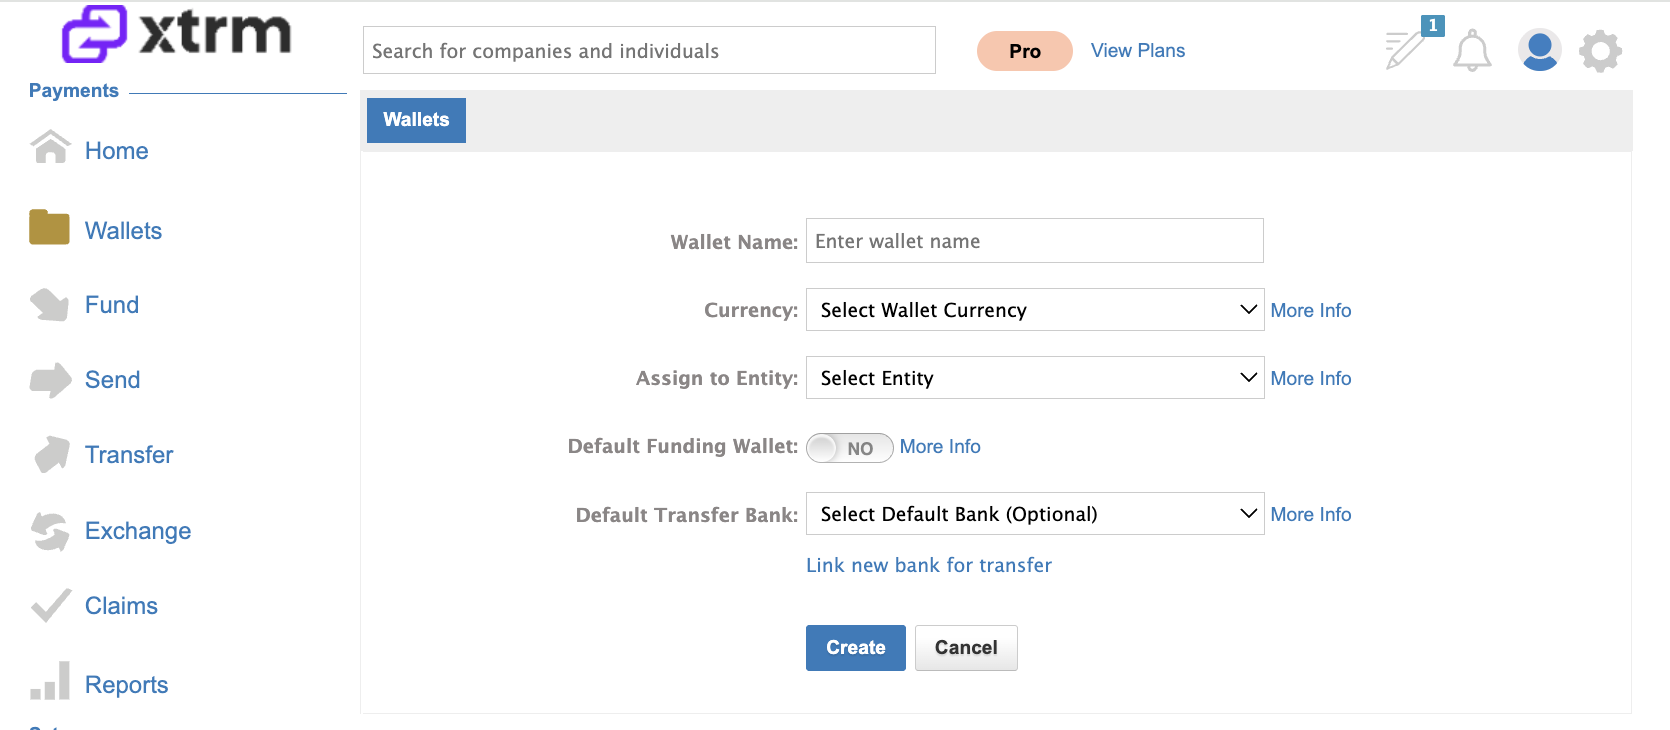
4. Configure your wallet:
Name & Currency: Choose a descriptive name and select the desired currency.
Entity Assignment: Assign the wallet to a specific entity. (Note: Only users with access to that entity will be able to view or manage the wallet).
Linked Bank (Optional): You may optionally set a default linked bank for "Bank Direct" payments
Deactivate a Wallet
You can deactivate a wallet at any time if it is no longer in use.
Important: Once a wallet is deactivated, funds cannot be sent to or from it.
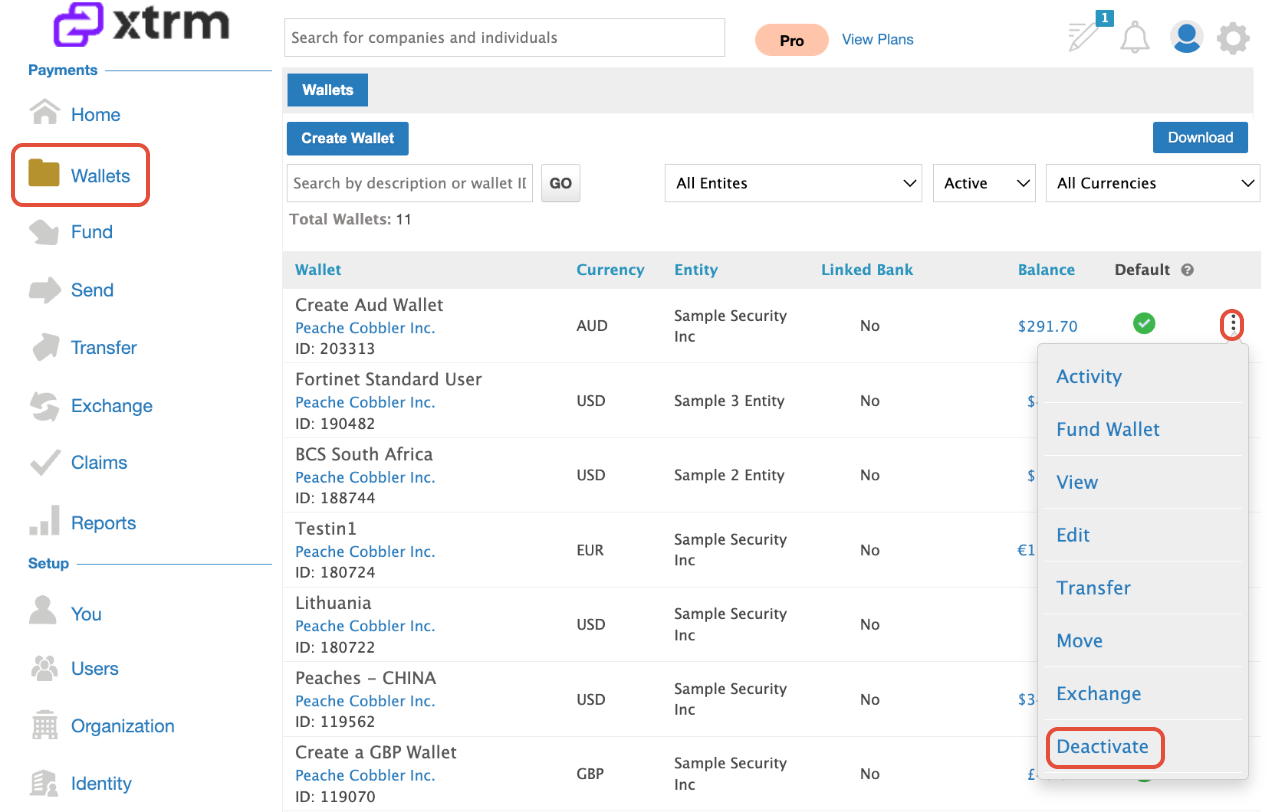
To deactivate: Locate the wallet in your active list and select the deactivate option.
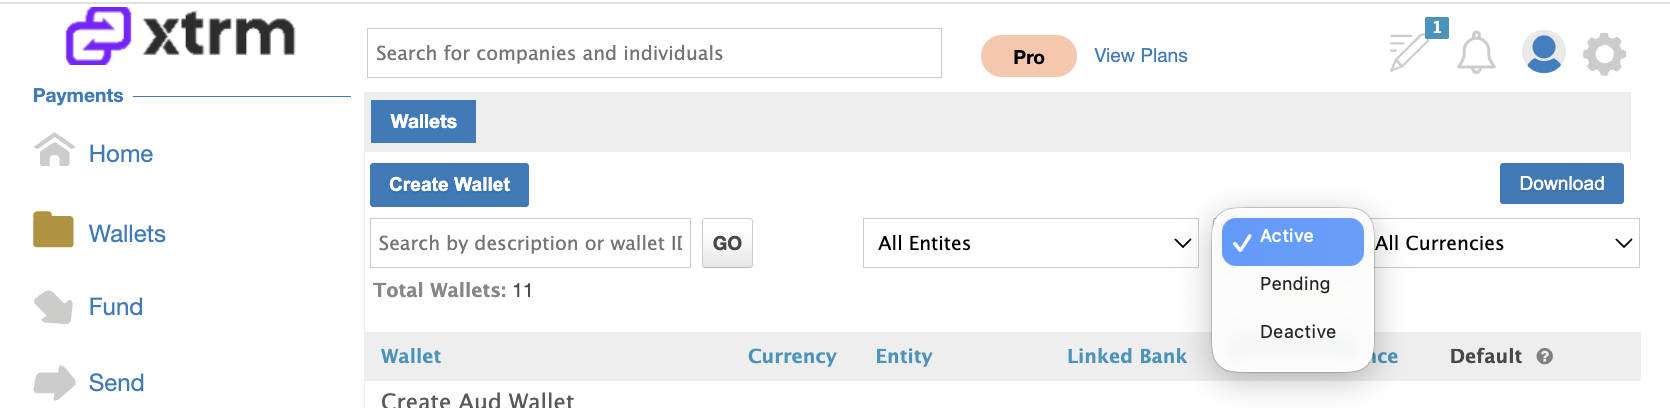
Active wallets are the defaulted view under the Wallets list, however, you can change the view from Active, Pending or Deactive
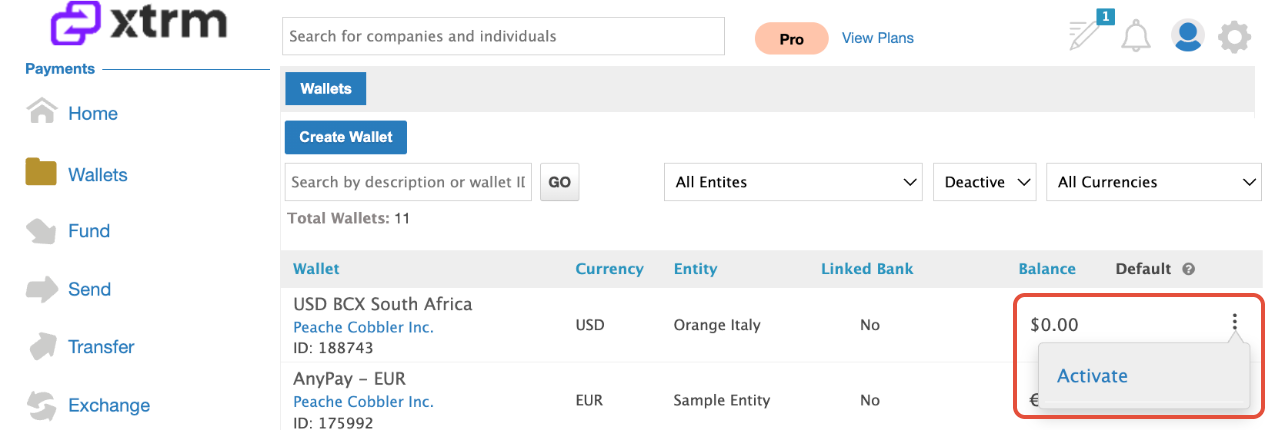
Activating a Deactivated Wallet
If you need to restore access to a previously deactivated wallet, follow these steps:
Navigate to Wallets in the left-hand menu.
Change the view filter by selecting Deactive from the drop-down menu.

3. Locate the specific wallet you wish to restore.
4. Click Activate to add it back to your active list.
Was this article helpful?
That’s Great!
Thank you for your feedback
Sorry! We couldn't be helpful
Thank you for your feedback
Feedback sent
We appreciate your effort and will try to fix the article